
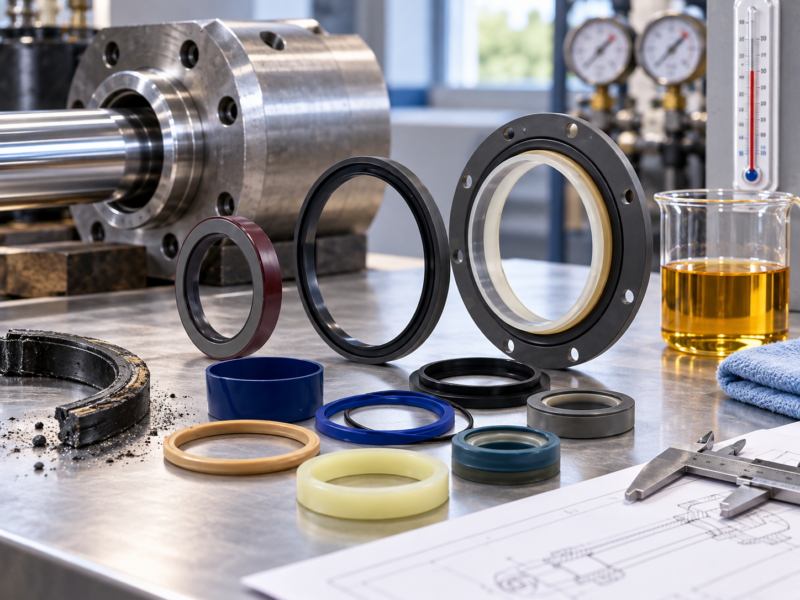
A rotary shaft seal installation checklist should start where failures do: before the machine turns. A sharp keyway can nick the lip, an uneven push can dislodge the garter spring, and a crooked start can distort the case. These are installation problems, not simply part-selection problems.
The key is to check the lip’s route onto the shaft, guide it past sharp features, apply force through the seal case, and verify the result before startup.
Keep sharp edges away from the lip, press the case squarely, and verify the assembly before startup.
If the seal tilts, resistance rises unexpectedly, or the spring slips out of place, stop and inspect rather than forcing it farther.
Pre-installation shaft, seal, housing, and tool checks
Most damage begins along the seal’s installation path, not at its final running position. Trace that path first. This guidance mainly applies to conventional elastomeric radial shaft seals, including spring-loaded designs; cassette, PTFE-lip, and other specialized seals may need different tools or lubrication methods.
Seal condition and orientation
Check that the seal matches the assembly and is free from deformation, dirt, a rolled lip, or a displaced spring. Confirm orientation from the equipment drawing or seal instructions; a general rule about lip direction may not apply to multi-lip designs.
Shaft running surface
Look at the actual lip contact area for scoring, corrosion, burrs, or an old wear track. Repeated leakage at the same position may point to shaft damage rather than a defective replacement seal.
Chamfer, keyway, spline, and edges
Trace every feature the lip must cross: chamfers, keyways, splines, threads, shoulders, and grooves. An edge that causes no problem in service can still cut the lip as the seal moves along the shaft.
Housing bore and seating area
Check the bore entrance for burrs, corrosion, old sealant, and debris. Identify the required seating depth or shoulder before pressing; a damaged entrance can make the seal tilt.
Installation tool and work area
Use a clean driver that bears evenly on the rigid seal case—not the lip or spring. Keep the shaft, bore, protective sleeve, and work area free of contamination.
Do not force a new seal into an unresolved problem.If the removed seal or mating surfaces show abnormal wear, identify the cause before installing another seal. Otherwise, a new part may fail in the same way.
CBD SEALS’ automotive sealing applications cover crankshaft and hub oil-seal positions. If replacement is needed, bring the shaft, housing, and damage findings into the selection discussion.
When a protective sleeve or guide is needed
A lip crossing a keyway, spline, thread, sharp shoulder, or damaged shaft end needs a smooth route. A correctly sized protective sleeve or assembly cone helps it pass without catching or stretching abruptly. The guide must also come away without pulling against the seated lip.
The distinction matters: a sleeve prevents installation cuts, but it cannot correct the surface the lip will run on. Use only the assembly lubricant and method approved for the particular seal and machine.
Press the seal squarely without disturbing the spring
A square start and a sound load path matter more than force. The driver should push evenly on the rigid case while the lip and spring remain unloaded. A seal that enters crooked rarely improves when pushed harder.
Apply even pressure through the case, keeping the driver away from the lip and spring.
Pressure on the flexible parts can distort the lip, shift the spring, or tilt the case.
- Confirm orientation before force is applied.Check the equipment or seal instructions; multi-lip and specialized seals may not follow the usual orientation rule.
- Set the seal square at the housing entrance.If one edge enters first, realign before continuing. Forcing it can distort the case.
- Apply steady force through the rigid structure.A controlled press distributes load evenly and makes unusual resistance easier to detect.
- Stop if resistance changes unexpectedly.Check for misalignment, debris, burrs, or a trapped sleeve instead of applying more force.
- Stop at the required installed position.Follow the drawing or specified shoulder/depth; the old seal’s position is not always a reliable guide.
What can dislodge the garter spring?
Uneven stretching as the lip crosses an edge—or contact from the driver—can pull a garter spring out of its groove. A displaced spring is a stop condition, not something to correct by pressing harder.
Post-installation checks before the shaft turns
A seal can look fully installed and still be reversed, tilted, or short of its required depth. Before rotation, compare the final position with the assembly specification and check for a rolled lip, misplaced spring, debris, or a sleeve left behind.
Confirm the specified depth or shoulder; do not overdrive the seal.
Look for an even case position around the bore.
Check against the assembly drawing before access is restricted.
Check for a cut or rolled lip and a displaced spring where visible.
Clear away debris, packaging, and temporary guides.
Use approved lubrication; check for binding only if safe rotation is permitted.
Dry startup is an installation risk, not only an operating issue.Without required initial lubrication, the lip can run hot before a stable film develops. Follow the seal or equipment instructions rather than assuming oil will reach it immediately.
What installation damage can tell you
Damage on a removed seal often reveals where the installation went wrong. Matching the symptom to the likely cause is more useful than simply fitting another seal.
Do not invent a universal installation force, interference value, or press depth.Press force, interference, and seating depth are design-specific. Use the applicable seal and equipment specifications, not a generic number.
What to watch during the first run
First rotation is a useful check, not a chance for a damaged seal to ‘wear in.’ Unexpected leakage, rubbing, heat, or resistance should lead to inspection, not repeated test cycles.
Before startup
- Confirm approved lubrication at the lip.
- Remove temporary guides and loose tools.
- Ensure guards and surrounding components are ready.
During initial rotation
- Watch for immediate leakage or case movement.
- Listen for new rubbing or unusual noise.
- Check for abnormal local heat where safe.
If something looks wrong
- Stop the equipment rather than cycling it repeatedly.
- Recheck orientation, seating, and shaft condition.
- Compare symptoms with the reason for the previous replacement.
For maintenance teams, having the correct driver and lip-protection sleeve ready before disassembly reduces improvisation. If the old seal has a cut, one-sided wear, or a displaced spring, keep it for the failure review.
When installation checks lead to seal selection
If the installation method is sound but leakage persists, confirm the seal construction and mating surfaces before ordering a replacement. CBD SEALS lists different seal arrangements, including the examples below. They are not interchangeable: size, shaft and bore fit, fluid, duty, and mounting method all matter.
Choose only after these checks
- Identify the existing seal type and orientation.
- Inspect the shaft and housing.
- Identify any sharp features along the fitting path.
- Confirm dimensions and service conditions.
Do not use product choice to hide
- Shaft or housing damage
- Force applied through the lip or spring
- Repeated crooked installation
- Contamination or dry startup

This CBD SEALS Combi Oil Seal example shows why orientation and protection of multiple sealing elements matter. Match the part to the original assembly before selecting it.
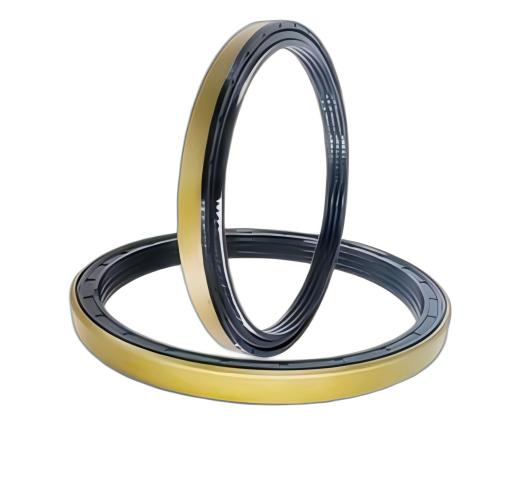
This cassette-style oil seal may require a different fitting method from a conventional single-lip seal. Confirm the complete assembly and the manufacturer’s installation procedure.
When contacting a supplier, share the existing seal identification, shaft and housing dimensions, application conditions, and photos of any damage. That helps distinguish a part-selection issue from an installation or hardware problem.
Rotary shaft seal installation FAQ
How can the sealing lip be protected during installation?
Use a clean sleeve or cone across keyways, splines, threads, or sharp shoulders. The lip should pass smoothly, and the guide should be removable without catching it.
What can dislodge a garter spring?
A sharp edge, uneven lip stretch, or tool contact can pull it from its groove. Stop and inspect if the spring has moved.
Should the seal lip be lubricated before startup?
Follow the seal and equipment instructions. Conventional elastomeric lips often require initial lubrication; some specialized designs specify different handling.
How can a keyway or spline damage the lip?
Their edges can nick or roll the lip while the seal moves along the shaft, even if the final running surface is undamaged.
What should be checked after the seal is pressed into the housing?
Check depth, alignment, direction, lip and spring condition where visible, cleanliness, and required lubrication before rotation.
Move from a controlled installation to the right seal discussion
Good installation starts with a safe path for the lip and ends with a verified seal position. If the next step is replacement, use the shaft, housing, and service details to discuss the appropriate seal—not dimensions alone.